
Theatrical performances should tell a story that transports the audience and seems to unfold seamlessly. A lot has to go on behind the scenes to make this possible. Without a rigging system, things like set changes will likely seem clumsy, which will detract from the story and interfere with the audience’s suspension of disbelief.
When the curtain opens and closes and the backgrounds and sets descend and disappear smoothly at just the right times, the show will be more enjoyable overall. If a play requires any flying stunts, a rigging system can also make that part of the story a reality.
A quality theatrical show should mask equipment like lighting, sets and backgrounds for other scenes so they don’t detract from the aesthetic quality of the show. Imagine if you were watching your favorite play and had to do your best to ignore all the unused set pieces at the back of the stage. You’ve likely never had to do that because a rigging system was in place to conceal all this equipment.
Rigging systems keep all the pieces you need for your show out of sight when they’re not being used. For centuries, curtains have provided a lovely frame for a theatrical stage and have helped to cover rigging systems, further obscuring equipment from the audience’s view.
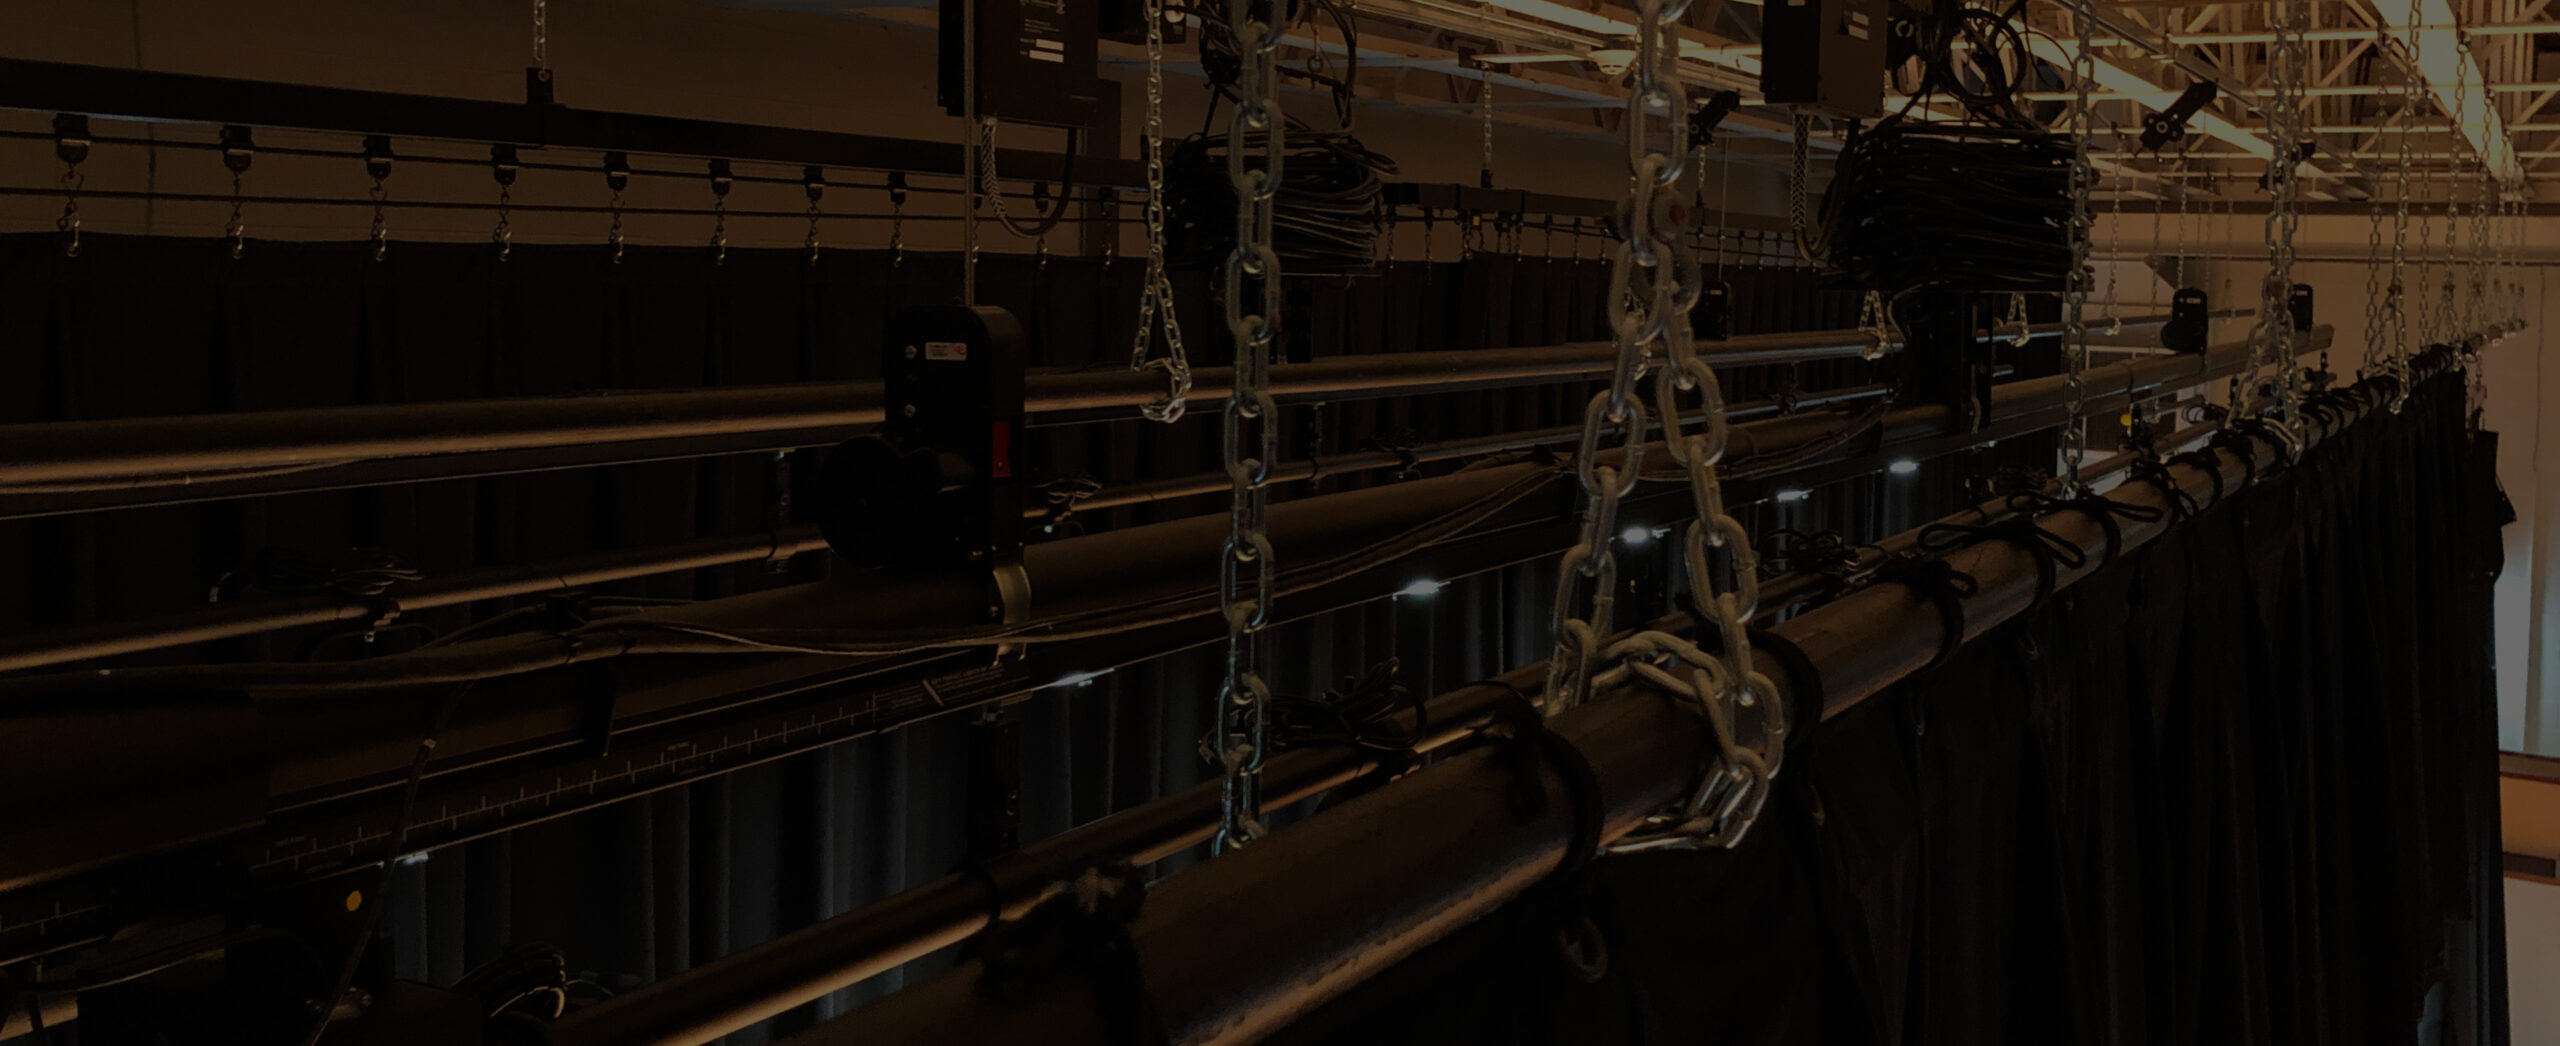
Battens are a centerpiece of rigging systems. If you’re only somewhat familiar with rigging systems, you’ll likely picture a batten first when you think of rigging design. This is the long steel pipe or truss where sets, lights and other equipment are attached. There are various types of battens, including electric battens, truss battens, tab battens and light ladder battens. The batten can be just a few feet long or can span the width of the stage.
The batten is suspended by lift lines and hovers up in the loft or “fly space” above the stage, where the audience cannot see. When a batten descends toward the stage, it is said to be “flying in,” and when it is raised, it is “flying out.” Other parts of the rigging system allow the batten to move like this.
As mentioned, the lift lines are what hold the batten in suspension. These lines are cables that attach to the batten and connect it to the rest of the fly rig. For shorter battens, there may be just two lift lines attached, and for longer battens, there could be several lift lines spaced out across the batten. For example, a 40-foot batten would likely have at least four lift lines attached to it.
The lift lines run through blocks in the rigging system, which allow the cables to move freely on the operator’s command. In a traditional rope system, the lift lines run up to the headlock and continue to run down to the fly floor. This means the lift lines are also the hand lines.
Pulleys are an important facet of rigging systems. You’ll often see these pulleys referred to as blocks. Blocks support the lift and operating lines and allow these lines to move in a controlled manner. In most standard rigging systems, the most important pulley is called the head block. All the lift lines within a line set have to pass through the head block at the corner of the rigging system.
There are other types of pulleys too, such as mule blocks, loft blocks, tension blocks and idler pulleys. These pulleys are positioned in various places along the rigging structure. Along with counterweights and other devices, the system of pulleys helps sets move as needed.
The arbor is also called the counterweight arbor because it is designed to hold counterweights. This structure is made up of steel plates at the top and bottom that are connected by a bar and rods. An operator can place a stack of counterweights and spreader plates topped with a locking plate on the arbor’s bottom plate in order to balance a load. The rods at the sides hold the weights in. Some newer arbors allow you to load in counterweights from the front rather than the sides.
The hand line emerges from the top of the arbor and works its way through the whole system of pulleys, ending at the bottom of the arbor. Guide systems of rails or wires help the arbor travel up and down.
The hand line is critical. This is the rope or cable that connects everything in the rigging system and is what operators use to control the system. That’s why hand lines are also called operating lines. In the past, hand lines were made from hemp rope. Today, hand lines for manual systems are still made from rope, but it is more often synthetic rope. Some lines are made from steel cable.
In manual systems, operators pull on the hand line to move scenery. In automated systems, there is no need to pull since a motor does the heavy lifting for you.
In order to keep a set from moving when it’s not supposed to, you need some sort of line control. One of the most popular examples for counterweight systems is a rope lock. Rope locks hold a hand line steady and keep a properly balanced load in place.
Other options for line control include belaying pins, swage fittings, trim chains, turnbuckles, shackles, cable clips and knots in the rope. A rope lock or other type of line control does not guarantee you’ll never deal with a runaway set — line control items are only designed for loads that are in proper balance with counterweights. It’s critical that you follow careful lifting and rigging procedures to maintain safety.
The power that moves the lines in a rigging system comes from hoists and winches. These terms are often used interchangeably, but technically, a winch is designed to pull the line horizontally while a hoist is designed to lift a load vertically.
Manual hoists and winches include a drum and gearbox with a hand crank you turn in order to let out the line or tighten it. These devices are still common in many rigging systems. Some hoists and winches are motorized, however, and run on an electric brake motor. Some types of motorized hoists and winches include drum hoists and winches, point hoists and winches, and line shaft hoists and winches. These devices make moving lines in the rigging system more convenient.
Lineset loads need counterweights to balance them. Traditionally, these weights were sandbags. Counterweight systems today generally use metal bricks, usually made from steel, as counterweights. Counterweights are placed within the counterweight arbor. Operators can add more or fewer counterweights as needed to provide the right balance.
As you change out sets or other loads attached to your rigging system, you will need to adjust the counterweights accordingly. This is a task that stagehands must perform carefully in order to prevent loads from running away during the process of counterbalancing.
It isn’t enough to have a quality rigging system in place. You also need to have a good understanding of proper rigging techniques in order to get the most out of your rigging system and operate your rigging equipment safely.
Stagehands should be thoroughly trained on how to use the rigging system correctly and safely. Training is essential because there are some possible dangers with rigging. For instance, improperly balanced loads could come crashing down. Operators should know how to avoid this hazard and how to respond if it ever happens.
There are also routine aspects of rigging that can be inherently hazardous. In some situations, stage crew may need to climb up the system to make repairs on parts that cannot be lowered down. This necessitates safety measures, such as wearing a harness and using ascenders and descenders.
Ascenders and descenders are tools that rigging technicians use to move up and down ropes in the rigging system. These devices are also used in other climbing applications. An ascender allows a person to climb up a rope freely without being able to move down, and a descender does the opposite. In either case, these devices can make climbing safer.